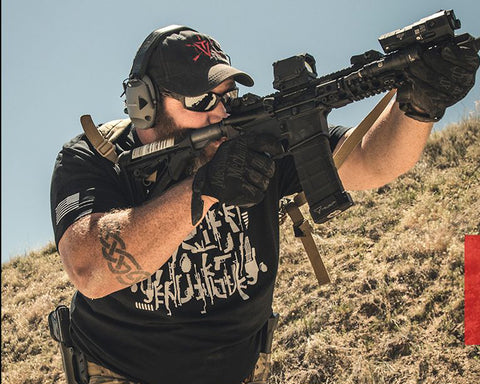
Imagine spending your hard-earned money on a guided hunting trip in Alaska, only to miss a once-in-a-lifetime shot because your scope was incorrectly mounted or not mounted with precision for those longer shots. Knowing how to mount a scope yourself can mean the difference between making the shot of a lifetime or missing it.
Why should I mount my own scope?
Why should I try to mount my own rifle scope when I can just pay the guys at my local gun shop to do it, or get it done from the factory for free?
Many gunsmiths will tell you that mounting your own rifle scope is the most important thing you can do to improve the performance of your rifle. Yes, there are many knowledgeable people in local gun shops that are great at mounting riflescopes but not necessarily mounted with precision in mind, which can cause a number of problems when you’re sending rounds down range.
Having a gunsmith mount your scope or even buying a rifle from the factory with the scope already mounted for you is like buying a high-performance sports car and not adjusting the mirrors and seat for you. You’re not going to get the performance you want. Even though the scope may be properly mounted to the rifle, there is no guarantee it’s going to work for YOU.
A Simple Step By Step Process On How To Mount a Scope
Step 1 | Using The Proper Scope Mounting Tools
Torque wrench – If you’re going to mount your own scope, this is a key tool that you must have. Don’t mount your scope without one.
Leveling Kit – There are several scope leveling kits available, but we recommend the Wheeler Professional Scope Mounting Kit. This kit comes with everything you need to align, attach, and level your scope for precision shooting.
Gun Vise for Stabilizing your rifle – Using something like the Tipton Best Gun Vise or Caldwell Lead Sled is another must-have item when mounting your own rifle scope. Your rifle needs to be stabilized and parallel to the working surface in order to get the proper scope alignment and level.
Step 2 | Securing the Base and Scope Rings
If you’re using a Picatinny rail, put a very light coating of oil on the underside of the rail before mounting it to prevent rust. Make sure not to get oil on the mounting screws. Apply Blue 242 Loctite to the base screws and torque the screws using the manufacturer’s specifications with your Wheeler torque wrench.
If you are using a traditional base/ring combo, follow the above steps, but only mount the lower half of your ring/base combo so you have the horizontal part of your bases to set your reference level on.
Most scope rings require between 30 and 45 inch-pounds of torque, but you’ll want to check the manufacturer specifications of the specific scope rings you’re using to be sure.

Step 3 | Scope Alignment
Use the alignment bars from the Wheeler Professional Scope Mounting Kit to align the scope rings.
Place the two alignment bars in each of the lower scope rings, install the top half of the scope rings to secure the alignment bars, and make any necessary adjustments to each until the points of each alignment bar are almost touching in the center. Keep in mind that scope alignment bars are specifically for the cam-style scope rings on older/more traditional bolt action rifles. They are unneeded on anything that uses a Picatinny or Weaver rail.
Once the scope rings have been aligned, it’s time to ensure everything is leveled by setting your scope into the bottom rings and then securing with the top rings. Only tighten the screws enough to secure the scope; DO NOT torque anything down. From here, determine your eye relief and then move forward with leveling.
Once the scope is secured in the rings, adjust the scope to the highest magnification and pick up the rifle from the gun vise, and shoulder it. With your rifle shouldered, look down through the scope and adjust the eye relief by slowly moving the scope forward and backward until optimal eye relief is achieved.
Step 4 | Scope Leveling
Once the alignment is set, you need to ensure that the crosshairs are level. Using the levels from the Wheeler Professional Scope Mounting Kit. Set the magnetic level between the tube of the scope body and the bolt raceway/barrel of your rifle.
Rotate the gun itself until the magnetic level bubble shows a perfect level. Now set the scope level on top of the scope turret cap and rotate the scope until it’s perfectly leveled.
Step 5 | Securing the Scope
With the scope base and rings installed and the scope itself aligned and level, it’s time to secure everything in its final resting position.
Using the recommended torque settings for the scope rings, tighten down each screw alternating from side to side to eliminate any unnecessary gaps on either side and keep everything evenly torqued, similar to tightening down the lug nuts of a car tire.

Conclusion
There is no one step-by-step guide that can cover how to mount a scope. There are many different brands of optics, rings, and mounting systems available, so it’s impossible to cover it all in one article.
We hope this simple step-by-step guide makes mounting your own scope seem like a little less daunting of a task. If you’re still a little unsure of your specific setup, contact the experts at Wheeler for guidance.
Related Articles:
- Top 3 Hunting Scopes From Crimson Trace
- Top 5 Must-Have Tools For Your AR-15
- Top 3 Gun Vises Buyers Guide
Stay Tuned to the RE Factor Tactical Blog and be part of this all VETERAN-run website. Be sure to follow us on Facebook, Instagram, and LinkedIn for exclusive content and deals.
Visit our Amazon Influencer Page for more products we recommend: https://www.amazon.com/shop/refactortactical


Leave a Reply
Your email address will not be published. Required fields are marked *