

Build Up Drill
Shooters having problems with shot anticipation will often miss the target by a significant margin even if they apply all other shooting fundamentals. Anticipation is precisely what it sounds like; a shooter is anticipating the recoil of the shot and attempting to brace for it instead of allowing their arms and body to absorb it. Bracing just before a shot will throw off your sight alignment and sight picture and cause your barrel to dip in most cases. Luckily, it is relatively easy to break the bad habit of anticipating shots if the shooter is willing to put in the time and effort.

Shot anticipation is identifiable in several ways. If you find that your rounds are grouping low and left of the target if you are a right-handed shooter, or low and right if you are a left-handed shooter, you are likely anticipating the shot. This is because predicting will cause the barrel to move just before firing and cause the muzzle to dip. Anticipation is flinching right before a round is fired. The severity of the flinch can vary from drill to drill, but if a shooter anticipates shots, a flinch will likely be present to some degree in almost every round fired by the shooter in most cases. If you have identified a shot group consistent with anticipatory shot groupings you should conduct a ball and dummy drill to ensure the problem is anticipation. A ball and dummy drill is conducted by having someone else load a dummy round randomly into your magazine before a shooter performs a multiple-round shooting drill. Once the magazine reaches the dummy round the pistol will fail to fire. It will be extremely apparent if the shooter is anticipating the shot or not because there will be no recoil to brace for. If the muzzle of the pistol moves forward at all when attempting to fire the dummy round, the shooter is anticipating the shot. The severity of anticipation can vary in degree, but shooters should strive to have no anticipatory movement when firing at all.
Setup

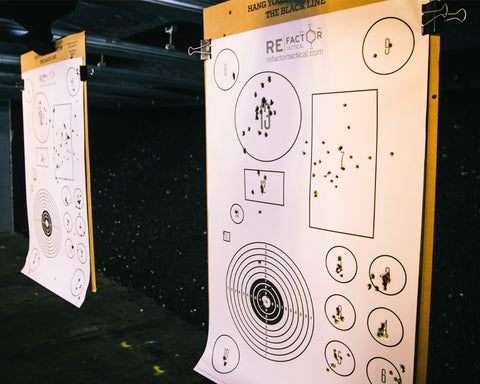
The Build Up drill is purposefully designed to start slow to master the basics, then progress to rapid-fire until anticipation is no longer present. This pistol drill is conducted from the five-yard line. This is because we are currently focusing on correcting anticipation and want to make all of the other fundamentals as easy to apply as possible. Accuracy from this distance shouldn’t be a problem so the shooter can solely focus on anticipation during this drill. A random dummy round should be added at least once during each stage of the drill to ensure the shooter is progressing through the drill correctly. Try and be as precise as possible throughout the drill so the benefit of the drill can be accurately assessed. It’s a good idea to start follow-on range sessions off with this drill as well if you have identified that anticipation is a problem for you.
Drill
Step One:
The Build Up Drill starts with an exaggerated 10 round slow-fire iteration. This means fire one round at a time and reset after each shot. The pistol should be holstered after each round if possible. If not, lower the pistol and take a second or two of rest after each round is fired. Take more time than is necessary to fire each round. Take the slack out of the trigger much slower than you would typically, find the exact breaking point of the trigger, and allow your sites to come back on target after the round is fired. This is done for two reasons; one, it lets shooters become intimately familiar with their trigger. The slack, break, and reset, of the trigger should be focused on to ensure proper trigger manipulation becomes muscle memory. Confidence in the trigger can do wonders for shooters in many regards aside from managing anticipation as well. Two, it forces shooters to take their time and realize that recoil is manageable and there is no reason to anticipate. Ideally, shooters will also find a more comfortable and practical shooting stance during this portion of the drill as well.
Tip: If the recoil is unmanageable and your stance is altered if you do not anticipate the shot, consider taking a more aggressive stance with your lower body. Also, try allowing your arms and shoulders to absorb the recoil more efficiently by keeping a slight bend in the elbows and not locking the elbows out. Beginning shooters tend to think that by keeping the elbows totally locked out it will help them control the pistol. This is often not the case, if a shooter allows the upper and lower body to work in conjunction to absorb the recoil rather than fight against it, the shooter will find that they can manage the recoil with much more success. If the elbows are completely locked out, and the upper body is tense, the recoil will affect the weakest point in the recoil path which is the hands and wrists. When shooters do not adequately absorb recoil and fight against it, the lack of recoil absorption typically leads to lousy recoil management which will cause the barrel rise because the wrists cannot manage the recoil without any assistance from the rest of the upper and lower body.

Step Two:
Once the shooter can fire all ten rounds without flinching, it is time to move on. Reload and begin the drill again, this time focusing on taking only 1.5-2 seconds to fire each round from the moment you start to take the slack out of the trigger to when it breaks and the round fires. Still, reset or holster the pistol after each shot. Reload and conduct the drill again taking 1 second or less to fire each round once you have begun to take the slack out of the trigger. Still, take as much time as you need to accurately acquire your target, and continue to holster the pistol after each round is fired.
Tip: Gradually increasing speed while decreasing the time it takes to fire each round ensures that the fundamentals are being applied, positive muscle memory is being created, and the shooter isn’t progressing through the drill too quickly.
Step Three:
The final step in this drill is firing multiple rounds in succession. The setup is similar to steps one and two, except multiple rounds will be fired between resets. Acquire the target and fire one round, release the trigger until it resets then fire the second round. ( Do not take your finger completely off the trigger, only release enough pressure to allow the trigger to reset and fire the second round). Holster the weapon after the second round and repeat the drill four more times totaling ten rounds. Once you are confidently able to make it through five iterations without flinching or anticipating before a shot, slowly progress one round at a time until you can fire an entire magazine in succession without anticipating. Ensure that rounds are being fired in a rhythm and not sporadically. Firing in a cadence will help to create positive muscle memory and helps to develop positive shooting habits. The goal is to be able to fire an entire magazine with half a second or less between rounds with no flinching or anticipation.

Conclusion
By going through the progression of this drill and taking the time to slow down and focus on the fundamentals of this drill, shooters should be able to improve upon their anticipatory deficiency relatively quickly. This drill not only emphasizes the fundamentals of marksmanship but increases confidence in a shooters ability to properly manage recoil. To gain the full benefit of this drill do not go through the motions. Focus on applying the fundamentals and do not move on to the next portion of the drill if you have not entirely mastered previous steps. To maximize efficiency and ensure improvement is being made throughout the progression of this exercise, a random dummy round should be added into a magazine by someone else multiple times in this drill to ensure shots are not being anticipated.
Leave a Reply
Your email address will not be published. Required fields are marked *