
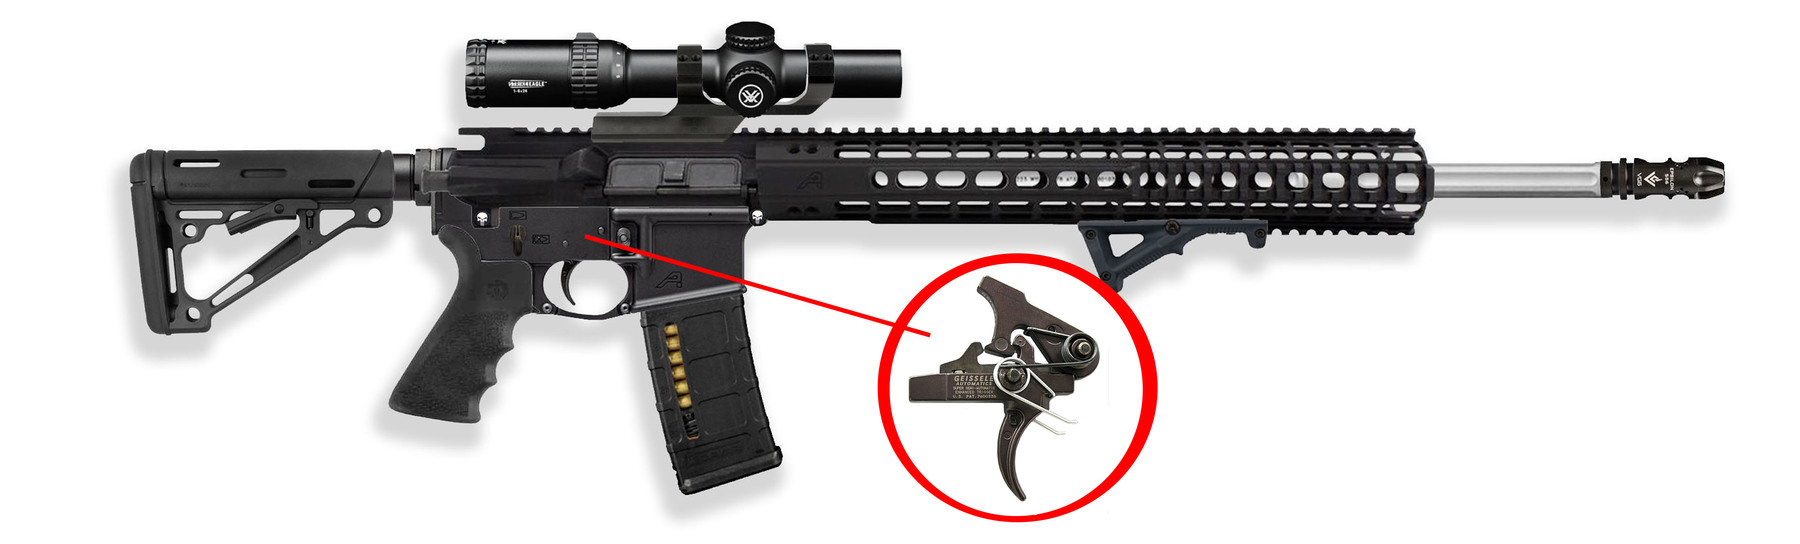
Last week I did a post on the various parts you might find in a pistol. This way, when you’re ready to do a custom build or replace parts, you have an idea of what each part does and the parts required. This week, I’m doing a similar post, but on a standard AR-15. If you’ve ever had questions about what each component does or its purpose inside an AR-15, hopefully, this blog will answer those questions.
Unlike a pistol, AR-15s have significantly more parts, but each component serves its purpose. To make things a bit easier to digest, I’m going to break the rifle into a few different parts: buttstock, lower receiver and firing control, upper receiver, bolt carrier group, barrel handguard, and front sight.
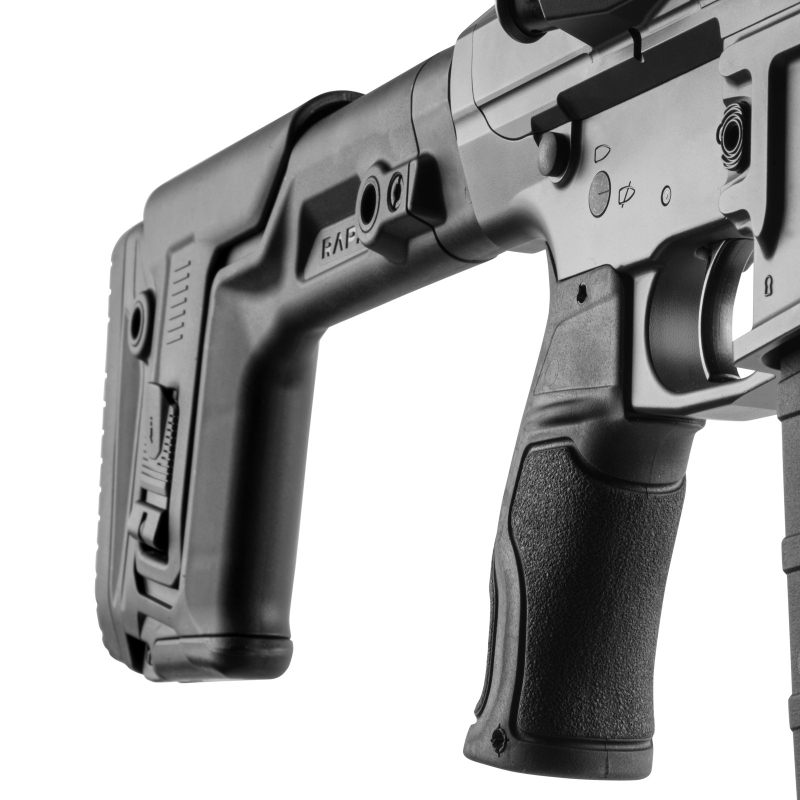
Buttstock
I’ve decided to make buttstock its own category because several parts make it up, it’s not just one stand-alone piece, and it has a function—other than protecting your shoulder from recoil.
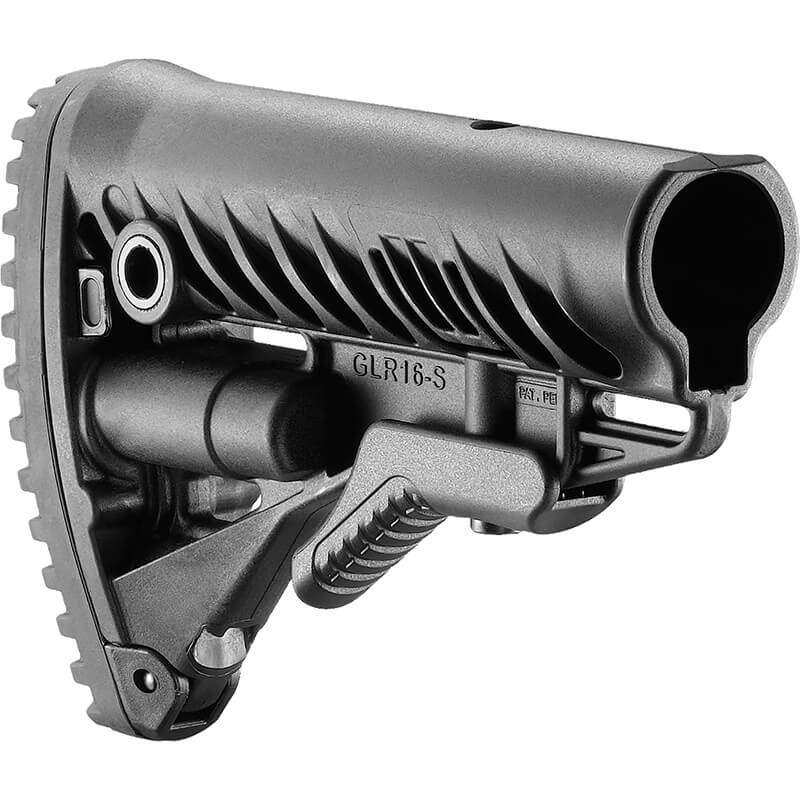
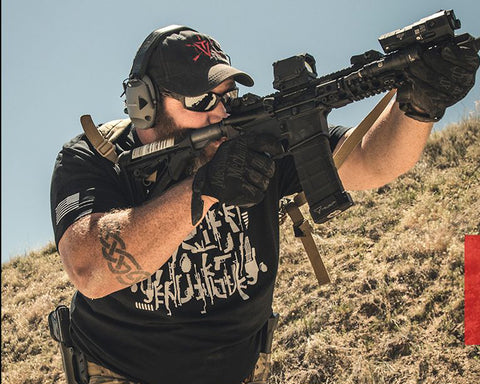
It also works as a cheekweld. If you didn’t know, having a proper cheekweld is a part of stabilizing your weapon, and in turn, being accurate in your shot placement. When I first when through training, my range instructor taught me always to have three points of contact on my rifle for the most stability. The first being the obvious, your trigger finger hand, the second being your support hand—non-firing hand—and the third your cheek. I was always taught to basically “mold” my cheek to the buttstock. If you can imagine it, think about one of those dogs with the cheeks that hang way down. Your cheek should be hanging or folded over your buttstock.
Of course, another thing to keep in mind when getting a proper cheekweld is the placement of your cheek on the stock. You should do your best to place your cheek in the same place every time.

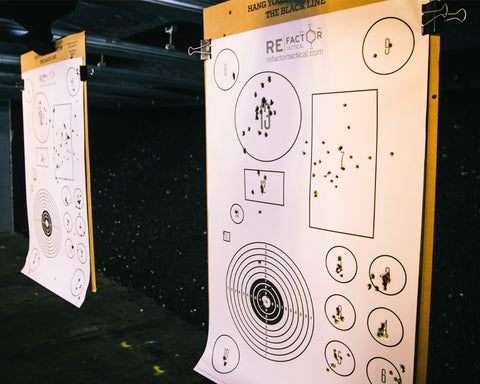
The reason you want your cheek in the same place every time is because of the sight picture. Sight picture and sight alignment are what you want if you’re aiming to hit the target, especially if you’re trying to hit the bullseye, and do it consistently.
Stock Placement
Think of it this way. If you want your favorite dish to turn out exactly the same way every time you follow a specific recipe. You never add in more than 1/3 cup of milk. And you don’t put in more or less than 2 eggs. Why? Because this will change the flavor. Suppose you’re off by even a little, too much, or too little salt. Too much or too little flour, then whatever you’re making might not be to your exact liking. You perform the same measurement with the same ingredients every time.
Imagine your shooting scenario in the same manner. Your goal is to end up with a bunch of holes punched in the center of your target. If your sight picture or sight alignment is too far one way or the other, you probably aren’t going to be hitting center. If your cheekweld is a little off or you’re further up or further back on the stock, you might find that you’re on target, but you’re not hitting the same place every time because you’re not physically set up the same way every time either.
So, every time you change something about the way you’re firing, you can almost expect that your shot placement will change too.
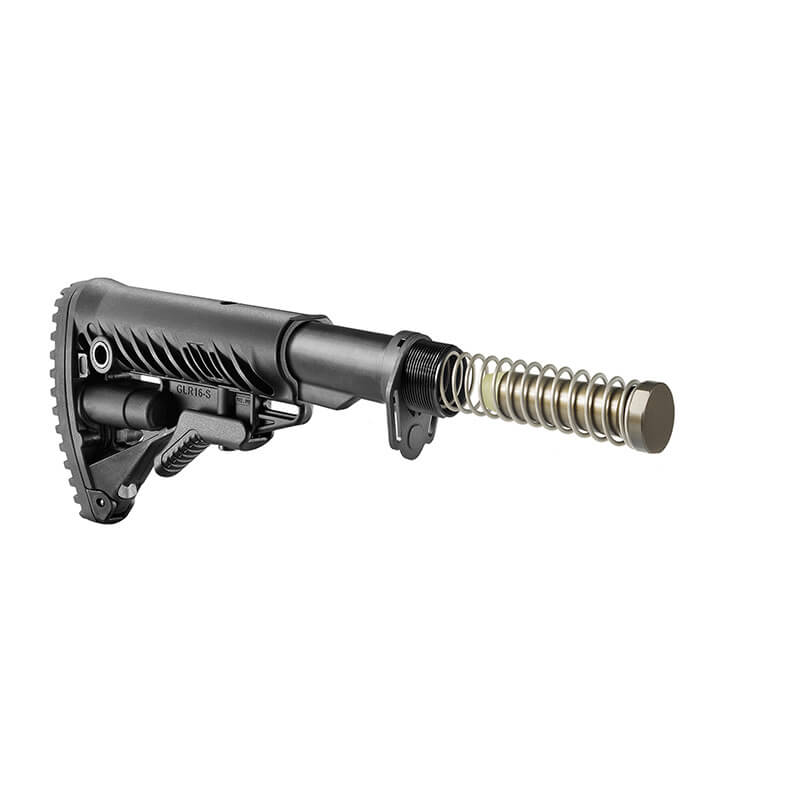
Buffer Tube
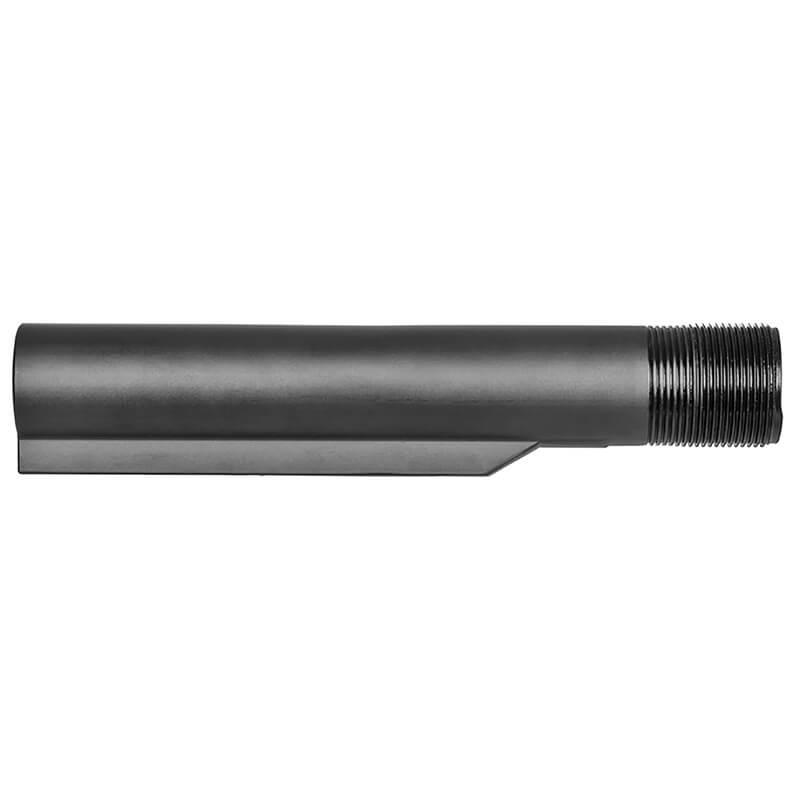
The buffer tube houses your buffer and buffer spring. However, it has a secondary purpose, which is to hold your buttstock.
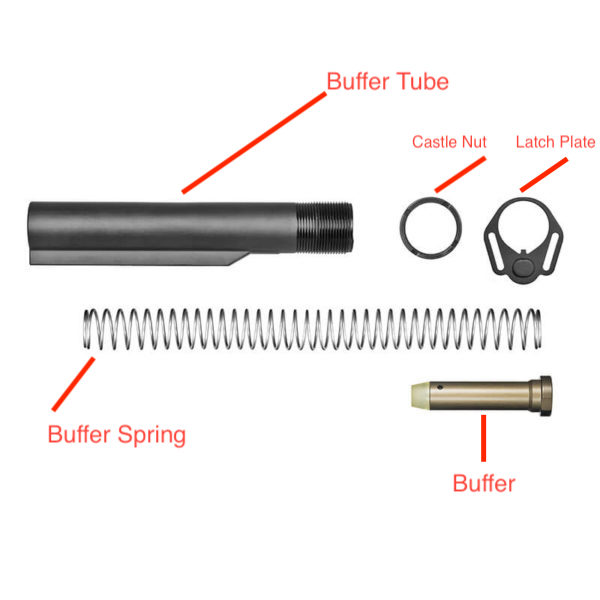
Buffer
Your buffer’s duty is to be the point of contact for your bolt carrier group, which I’ll get to soon enough. When you pull the trigger on your AR-15, the bolt carrier group moves to the rear, hitting the buffer. The buffer spring and buffer recoil and push back into your bolt carrier group, sending it forward and loading a round into your chamber while closing your bolt (another component I’ll cover shortly). Basically, your buffer—and the spring—are responsible for helping the cyclic action of your rifle.
Buffer Spring
Your buffer spring aids in pushing your bolt carrier group forward so that a round can be pushed into the chamber.
Castle Nut
Your castle nut serves a pretty important purpose. It’s a nut that looks similar to a castle—hence the name. Sometimes you might hear someone call it a buffer tube nut because it’s attached to the buffer tube (many parts have more than one name, depending on who you’re talking to).
Now, let’s talk about why this piece is so important. A castle nut holds everything together. If it becomes loose, then other parts become loose, such as your endplate—I’ll cover the in a moment. If your endplate becomes loose, it means your takedown pin spring and takedown pin detent will fall out. Now, if that happens, it means your receiver extension can move. And if that piece moves, your buffer retainer won’t stay put either.
If your buffer retainer moves, guess what else moves? Your buffer and buffer spring, but not in the way they’re intended. Now you’re working with an AR-15 that’s either going to explode—because your buffer retaining got trapped in your upper receiver and your bolt didn’t fully seat, meaning your round went off inside the receiver and not the chamber—or in a better case than exploding guns, the receiver extension falls apart.

Receiver End Plate
Your castle nut tightens your receiver end plate down. This plate makes sure your rear takedown pin spring and rear takedown pin detent stay in their proper place. Basically, this plate is important because it helps holds the upper and lower receiver together.
Buffer Retaining Pin (Buffer Detent Pin)
A buffer retaining pin is that little piece that sticks up in front of your buffer. The trick I was taught was to use the tip of your charging handle to help get the buffer and buffer spring out over this pin by pushing on it.
Anyway, this pin helps keep the buffer in place when you take your AR-15 apart. Otherwise, it’s going to fly out—might hit you in the face, might not.
If you do a quick search, you’ll find that some people take the buffer retaining pin and spring out. This is not a blog arguing what you should and shouldn’t do with the parts—you can do that in the comments—I’m just here to tell you the intended purpose of the components.
Buffer Retainer Spring
The buffer retainer spring goes into the end of your buffer retaining or buffer detent pin. You can often get these two pieces as a set instead of buying them separately. Because if you do so, choose to keep the buffer detent in your rifle; you’ll need a spring to push it up.
Rear Takedown Pin Spring/Rear Takedown Pin Detent

The rear takedown pin spring and takedown pin detent are intended to make sure your rear takedown pin doesn’t fall out. In most cases, the spring is sticking slightly out of the hole. However, some rifle manufacturers have an internal or built-in spring retention system. If this is the case, the spring might not be sticking out.


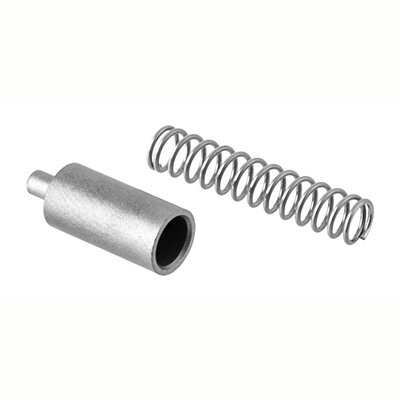
Helical Spring
Every part has its purpose, no matter the size. The helical spring (also referred to as a coil spring) is one of these parts. In general, these springs are intended to stop and release energy. They also do things like absorb shock and maintain a force between it and any surface it’s in contact with, which is why you’ll find one of these little guys inside of your rifle with a shoulder pin going through it.
Lock-Release Lever
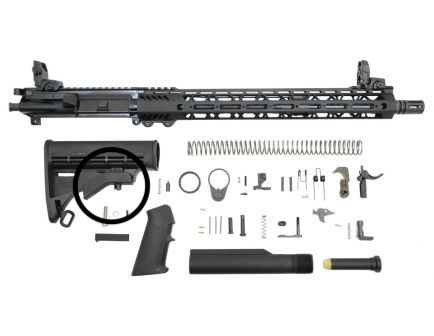
The buttstock lock release lever is used to lock the buttstock into your desired position. For instance, if you have a shorter reach or you’re doing CQB, you might want to adjust your buttstock to a shorter length. If that’s something you need, you will use the lock release lever to achieve this.
Lower Receiver and Firing Control

Hammer
The hammer in your rifle works like a hammer. When engaged, it strikes the firing pin, which strikes the primer and sets the bullet into motion.
Safety Selector Lever
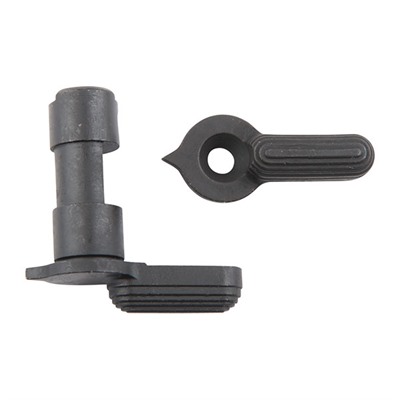
The safety sector lever is used to place your rifle on safe or fire. If the components of your firearm are working properly, you shouldn’t be able to pull the trigger back when the safety selector lever is pointing toward safe. Likewise, if the selector is pointing toward fire, you should be able to pull the trigger completely to the rear.
Bolt Catch
The bolt catch holds the bolt open after you’ve finished firing all your freedom rounds from the magazine.
Magazine Catch
The magazine catch keeps your magazine in place once you insert it into the magazine well. This piece is an extension of your magazine release button.
Magazine Release Button
Your magazine release button is what it sounds like, a button to you hit to drop your magazine out of the magazine well.
Trigger Guard
Your trigger guard is what protects your trigger from accidentally being engaged. Some trigger guards come down to allow room for those who are shooting with thick gloves on.
Disconnector
The purpose of a disconnector is to disengage the trigger from the sear of the firearm when the trigger is pulled.
Trigger

Triggers come in a wide variety. If you’re looking to do some competitive shooting, you might decide to replace your factory trigger for something with a lighter trigger pull weight requirement.
Pistol Grip
The pistol grip is kind of what it sounds like; only this grip isn’t attached to a pistol, but rather a rifle. A pistol grip is one of the points of contact I wrote about at the beginning of the article. Much like your cheekweld, your pistol grip also matters when it comes to accuracy.
You want to hold your firing hand on the pistol grip the same way every time. You don’t want to squeeze the grip so tightly that you’re shaking. Like your cheekweld, consistency is key. Hold the grip firmly while pulling the trigger to the rear.
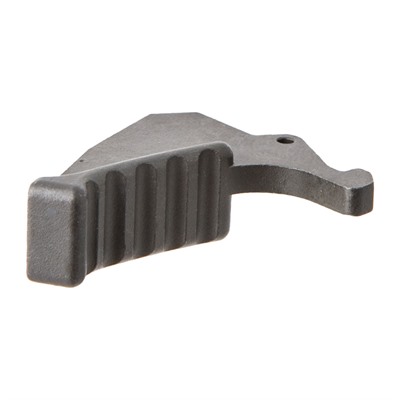
Charging Handle
The charging handle is what you pull back to charge the bolt to the rear.

Charging Handle Latch
This part is simply to make sure your charging handle stays in place.
Upper Receiver

Forward Assist Plunger
Your forward assist plunger is more than a springy device you hit for fun. Simply hitting it, its use can go unknown. If you don’t have a lot of experience shooting a carbine rifle, it might seem like a foreign device. But, I promise it does have a purpose.
In simple terms, when the forward assist plunger gets pressed, it causes the bolt carrier group to close by moving the bolt forward. Basically, it helps push a round into the chamber on the off chance that the buffer/spring didn’t get the job done for you, better known as a failure to feed.
So, let’s say you go to charge a round. But wait, it doesn’t fully seat inside the chamber. Instead of racking the bolt back again and ejecting the round, you might consider hitting the forward assist plunger first. In a perfect world, this action would cause the bolt to close and send the round into the chamber.
It’s essential to understand this feature is available because if you’re in the middle of a war, every round counts. You don’t want to keep ejecting perfectly good rounds and then have to spend time reloading them into the magazine. And you don’t have the time or the ammo to waste; try hitting the forward assist first.
Ejection Port Cover
Your ejector port cover is simply the cover that closes over the ejector. When firing your weapon, the ejector port cover is open, which allows the cartridge to be ejected after firing a round.
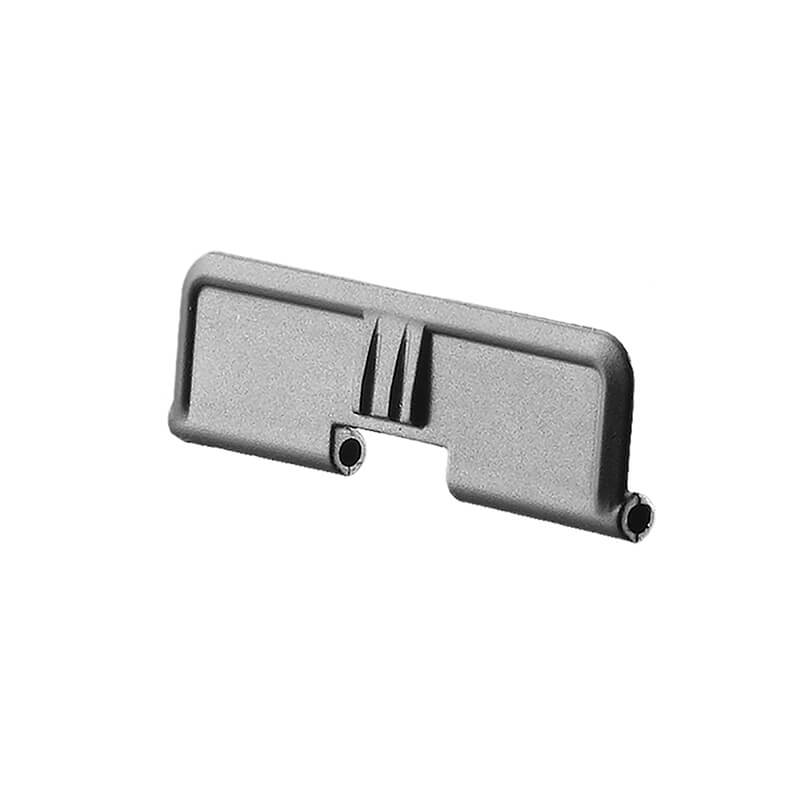
When you’re not firing, the ejector port cover is typically closed and helps keep out dust and debris, protecting the innards of your firearm.
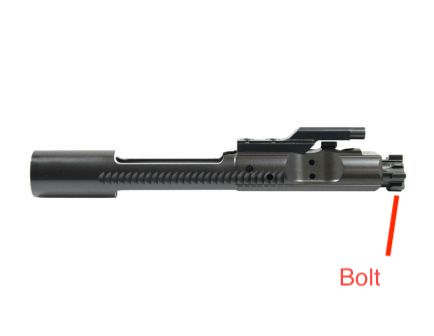
Bolt Carrier Group
A bolt carrier group is a group of some pretty important parts required to make your rifle function as it does. Of course, included in this group is your firing pin because you can’t fire a weapon without some way of striking the primer. Also included are the parts needed for extracting spent rounds and pushing new rounds into the chamber. Such a small group of parts, but oh so important.
Bolt Carrier
The bolt carrier is the part that carries your bolt and all those other vital components required to fire your weapon quickly and easily.

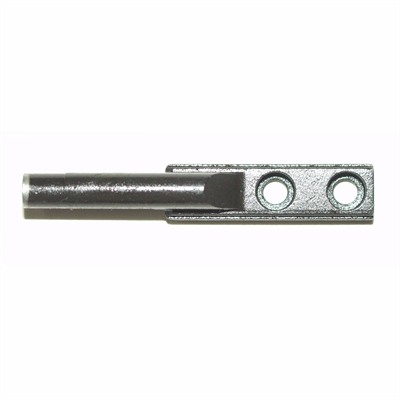
Bolt
The bolt is the component that slides into the end of your bolt carrier. This is the component that houses your extractor, which extracts the spent shell from the chamber and pushes and new round in.
Bolt Carrier Key
The bolt carrier key, also known as the gas key, is the part where all that extra gas goes to make your bolt carrier group move backward into the buffer.
Bolt Cam Pin
The cam pin is the piece that keeps the bolt from overly rotating when it unlocks.
Bolt Gas Rings (3)
Bolt gas rings are found on your bolt, and they are there to trap the gas expansion, so the gas operates the bolt.
Firing Pin
The firing pin sits inside your bolt carrier group. It is the pin responsible for making your rifle fire. Without a firing pin, your round will not fire through the barrel at your intended target.
Why? Because you need a firing pin to strike the primer, igniting the propellant and sending your bullet on its way downrange.
Firing Pin Retaining Pin
The retaining pin ensures that the firing pin doesn’t fall out of the bolt when the bolt carrier group moves forward.
Extractor
The extractor is the piece that takes hold of the casing’s rim, so the spent shell can be ejected out of your rifle, making room for a new round.
Ejector
The ejector works with the extractor to get your spent round out of the way for a new round. The extractor extracts the spent round from the chamber, and the ejector ejects it out of the ejection port.
Barrel, Handguard, and Front Sight
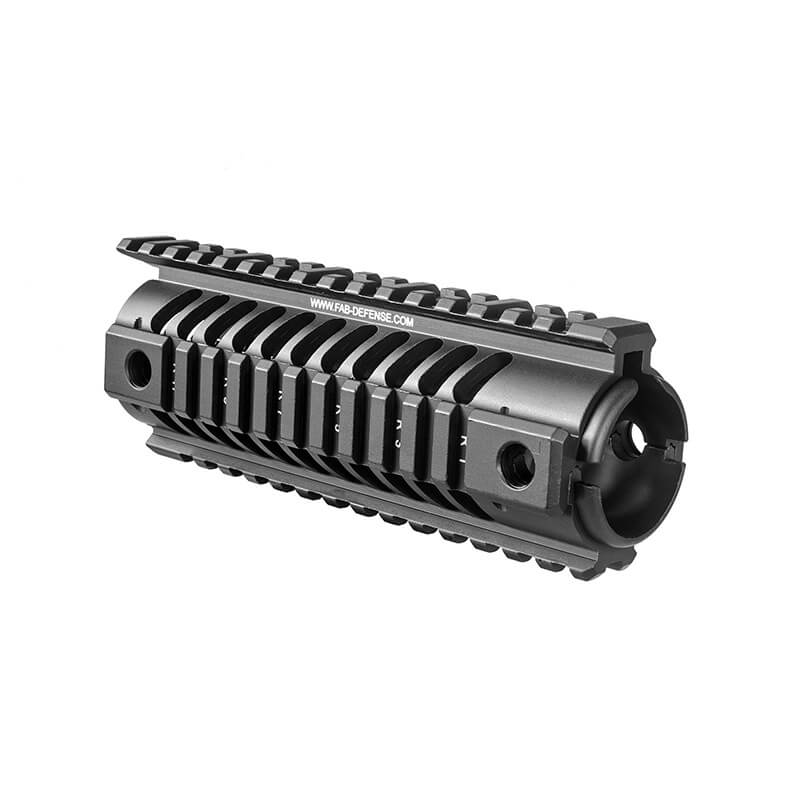
Handguard Set
Your handguards are basically what they sound like. They guard your hand against the hot barrel and give you a place to wrap your non-firing hand—one of those points of contact needed to help stabilize your rifle and aid in accuracy. Handguards (free-floating or drop-in) give you a frontal grip.

Barrel Retaining Ring
Depending on what type of handguards you’re putting on your rifle will depend if you need the barrel retaining ring, weld spring, and delta ring. Your best bet is to look at the instructions for your handguards and see what it says.
Weld Spring
The weld spring is a part of your delta ring assemble, which I’ll get to next. It is used to attach the barrel of your rifle to the upper receiver, specifically when you’re using drop-in handguards.
Delta Ring
The delta ring helps keep tension on and therefore keep your handguards in place.
Front Sight Post
Your front sight post is that small post that sits at the front of your barrel. It’s the piece that you focus on when firing your rifle. Your target should appear blurry, and your front sight post should be clear and focused.
Front Sight Base
The front sight base is where your front sight post, detent, and detent spring resides.
Gas Tube
The gas tube is needed to help cycle your rounds and lies between the handguards/rails and barrel. While some gas travels out the muzzle because it’s needed to send your round out of the chamber, some of that gas also goes through your upper receiver into the key screwed on top of your bolt carrier group. When this happens, the gas forces the bolt carrier group back into the buffer, and when the bolt carrier group is pushed back from all this gas, the extract pulls the casing out of the chamber. Because you have a buffer spring, the buffer shoots the bolt carrier group forward again, pushing a new round into the chamber.
All of this is possible because the gas tube (and gas block, which tracks the excess gas) redirects the gas/energy caused by igniting the powder in your bullet.
Some AR-15s operate using a piston system, but more on that in a different blog.
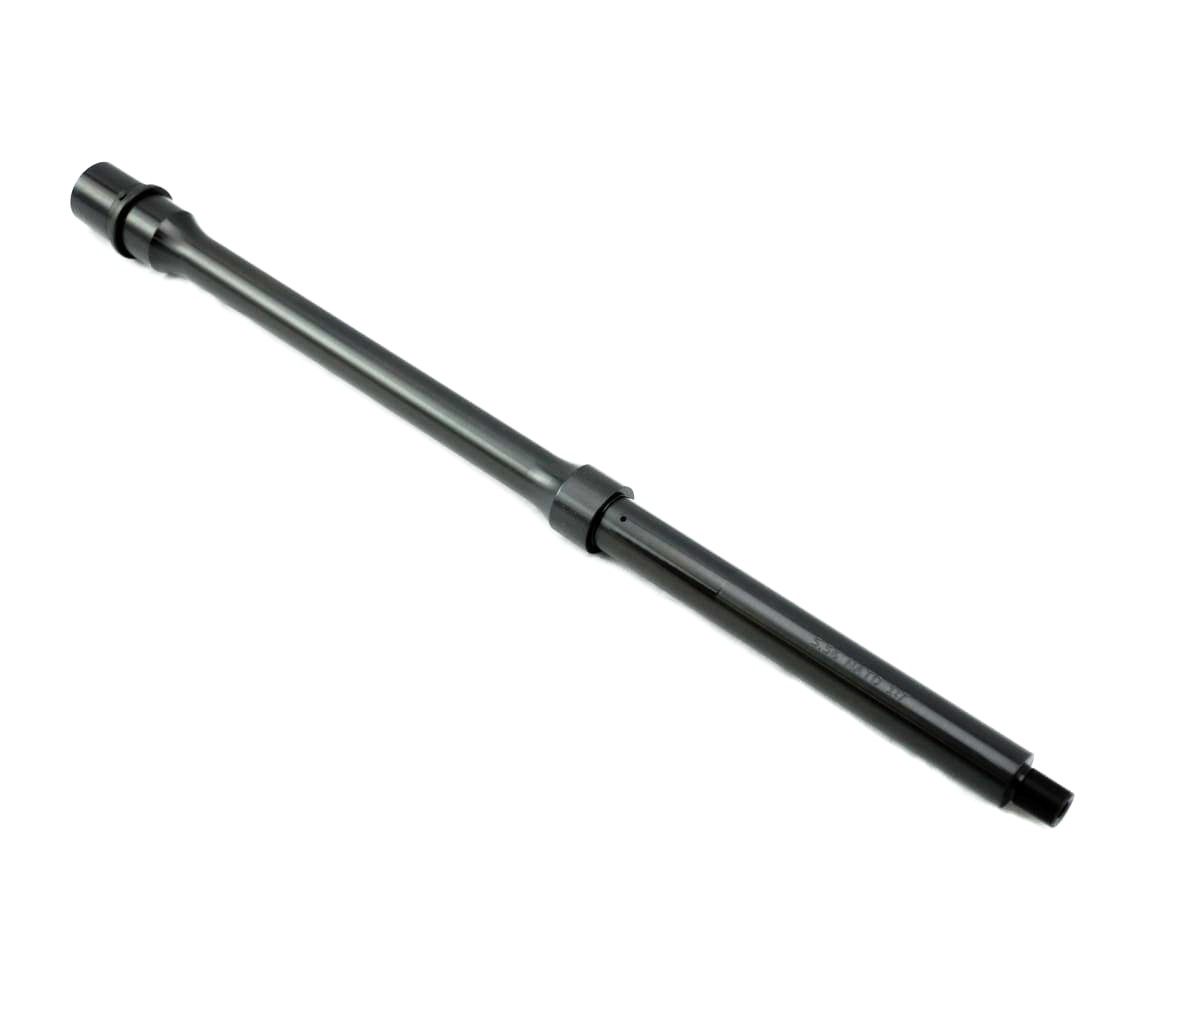
Barrel

Your barrel is where your bullet travels through. You can get a variety of lengths for a variety of calibers. The ones pictured here are for a 5.56 and .223. As you can see, they also come in a variety of materials, weights, and looks.
Barrel Indexing Pin
The barrel index pin ensures your rifle’s barrel and receiver are aligned.
Barrel Nut
Your barrel nut ensures your user receiver is secured to the barrel, and it also helps retain your handguards.
Crush Washer
The crush washer locks your muzzle device and barrel shoulder together. Every time you remove your muzzle device, you need to replace the crush washer as well. This is because you are physically crushing the washer to create that locking effect.
A lot of vibration happens when firing your weapon; that’s why a crush washer, specifically, is used. All this vibrating can cause a standard washer to loosen. If this happens, your muzzle device could quite literally be shaken off. However, the crush lock prevents the vibrations from creating such an outcome.
So, even though it’s only a washer, it’s still pretty important. Keep in mind, again; you are intentionally crushing this washer—hence the name—so you should keep tightening the device even after feeling resistance. This is what locks your device in place, so it can’t vibrate loose.
Compensator
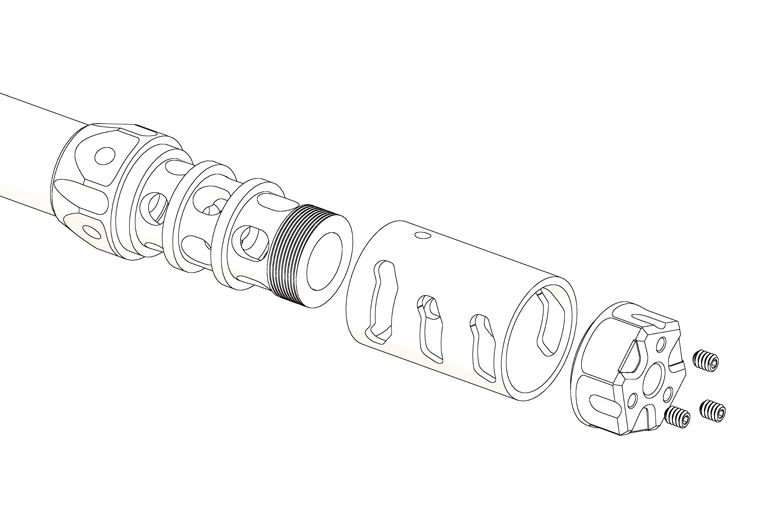
A compensator is a component that goes on the end of your muzzle. We call this part, whether it be a compensator or muzzle brake, a muzzle device. A compensator helps to reduce muzzle flip (or muzzle rise/climb).

Springs, Pins, Detents, Washers, Nuts, Plungers, and Screws


There are a lot of pieces that hold a rifle together. In general, springs provide tension, and pins, detents, washers, nuts, and screws keep everything in place/secured. While I didn’t list every nut and screw and the importance of its role, I am providing a list of those pieces below. Keep in mind, the larger components that require these small pieces to be installed typically come with the parts listed below.


- Hammer Spring
- Extractor Spring
- Bolt Catch Spring
- Ejector Spring
- Disconnector Spring
- Front Takedown Pin Spring
- Forward Assist Spring
- Charging Handle Latch Spring
- Magazine Release Spring
- Ejector Port Cover Spring
- Front Sight Detent Spring
- Trigger Spring
- Safety Detent Spring

Photo Credit: Brownells/Charging Handle Latch Pin 
Photo Credit: Brownells/Forward Assist Roll Pin 
Photo Credit: Brownells/Trigger Guard Roll Pin 
Photo Credit: Brownells/Extractor Pin 
Photo Credit: Brownells/Extractor Roll Pin 
Photo Credit: Brownells/Spring Pin 
Photo Credit: Brownells/Hammer and Trigger Pin


- Charging handle Latch Pin
- Pivot Pin
- Takedown Pin
- Forward Assist Roll Pin
- Trigger Guard Roll Pin
- Extractor Pin
- Bolt Catch Pin
- Ejector Roll Pin
- Gas Tube Roll Pin
- Shoulder Pin
- Front Sight Taper Pin
- Spring Pin
- Trigger Pin
- Hammer Pin
- Ejector Port Cover Pin
- Front Takedown Pin Detent
- Front Sight Detent
- Safety Detent

Photo Credit: Brownells/Pistol Grip Lock Washer 
Photo Credit: Brownells/Pistol Grip Screw


- Pistol Grip Lock Washer
- Self Locking Nut
- Bolt Catch Plunger
- Bolt Carrier Key Screws (2)
- Pistol Grip Screw
Conclusion
When we talk about firearms, we typically break them down into two groups, the upper and lower receiver. But that doesn’t mean there aren’t a lot of small parts that go into making up those two groups. Above is a lengthy list of the various components you’ll most likely need to build your AR-15. In some cases, you won’t need all these parts, such as the delta ring. And in many cases, the features are customizable. The above is simply a list to help you understand the various parts of building a rifle.
Yes, there are some sections I could have given more attention to and gone further in-depth. However, I’m not a book writer; I’m a blogger. So, for the simple purpose of length, these are just the basics. If you’d like to add additional information or other parts not listed, please feel free to provide your input in the comments below.
Did we miss anything? Do you have further recommendations? Please, comment below. We love hearing from our readers!
Looking for more content? Check out some of our other stuff!
Leave a Reply
Your email address will not be published. Required fields are marked *